

Backup & Import is a feature of the Mac version of Sonto. To open it, click the
Sonto menu in the menu bar and choose Backup & Import….Back up your data
A backup is a single file that contains a complete, portable copy of your Sonto data — your areas, projects, tasks, tags, repeating tasks, and your planning. It does not include app settings or your calendar connections, which are specific to each device.Your backups stay on your Mac, in a folder that only Sonto can write to. Nothing is uploaded anywhere — it’s your data, on your machine.
Automatic backups
Sonto can back up for you automatically, once a week. This is turned on by default. You’ll see when the most recent automatic backup was made, so you always know you’re covered. You can turn this off, but it’s a handy safety net — leave it on unless you have a reason not to.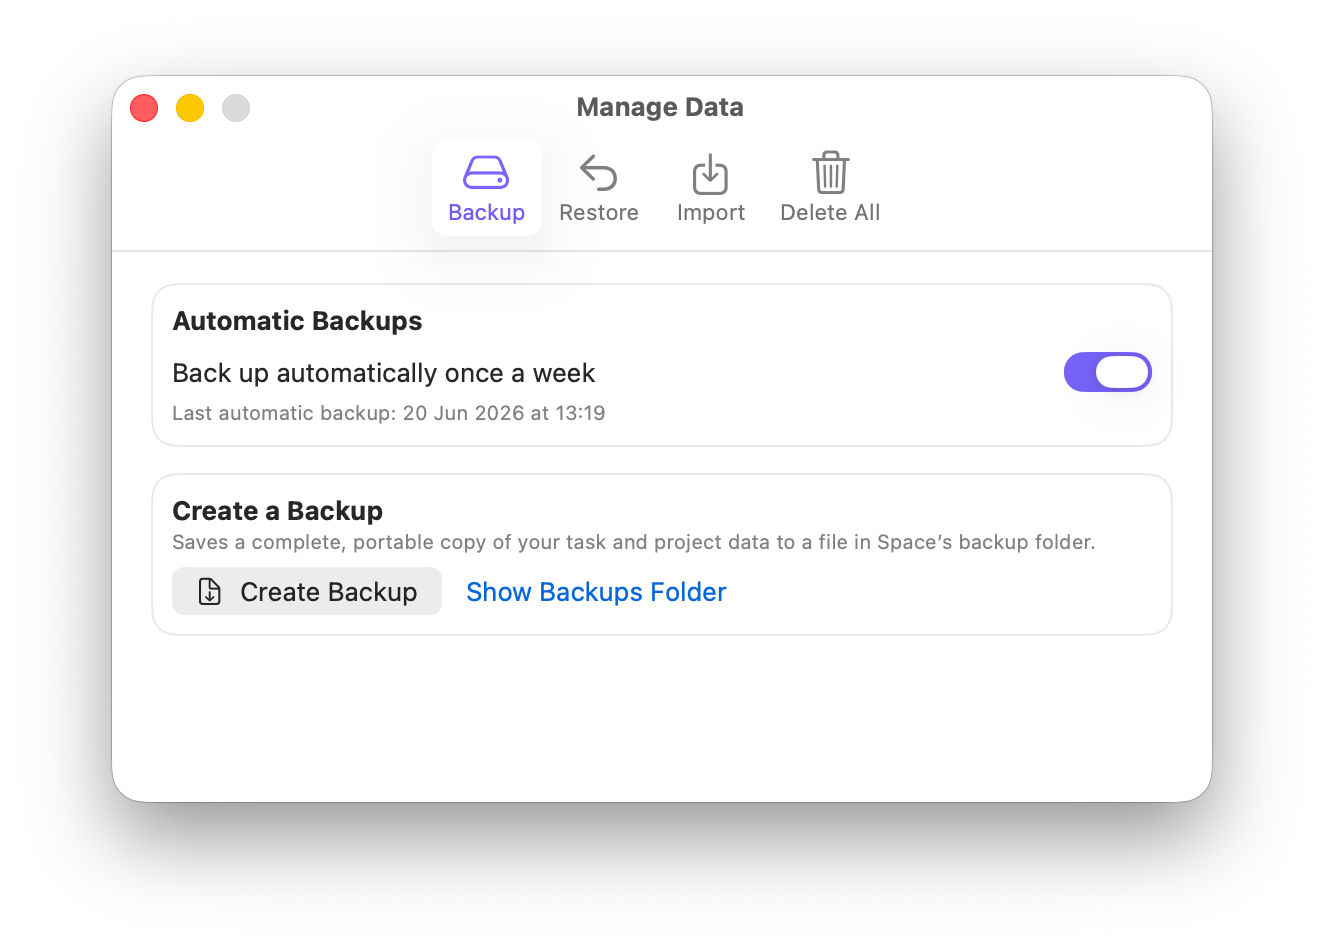
Automatic and manual backups
Create a backup yourself
To make a backup on the spot, clickCreate Backup. Sonto saves the file and reveals it in Finder so you can see exactly where it landed.
To find your backups again later, click Show Backups Folder. This opens the folder in Finder, where both your automatic and manual backups live. From there you can copy a backup somewhere extra safe — an external drive, a USB stick, or your favourite cloud storage.
It’s a good idea to keep a recent backup somewhere other than your Mac. That way you’re covered even if something happens to the computer itself.
Restore from a backup
Restoring brings data back from a backup file. The Restore tab lists the backups already in your backups folder, newest first. Each one shows whether it was made automatically or manually. ClickRestore… next to the backup you want, or Show to reveal it in Finder.
If your backup lives somewhere else — say you copied it from another Mac or restored it from Time Machine — click Open Backup File… and pick the file.
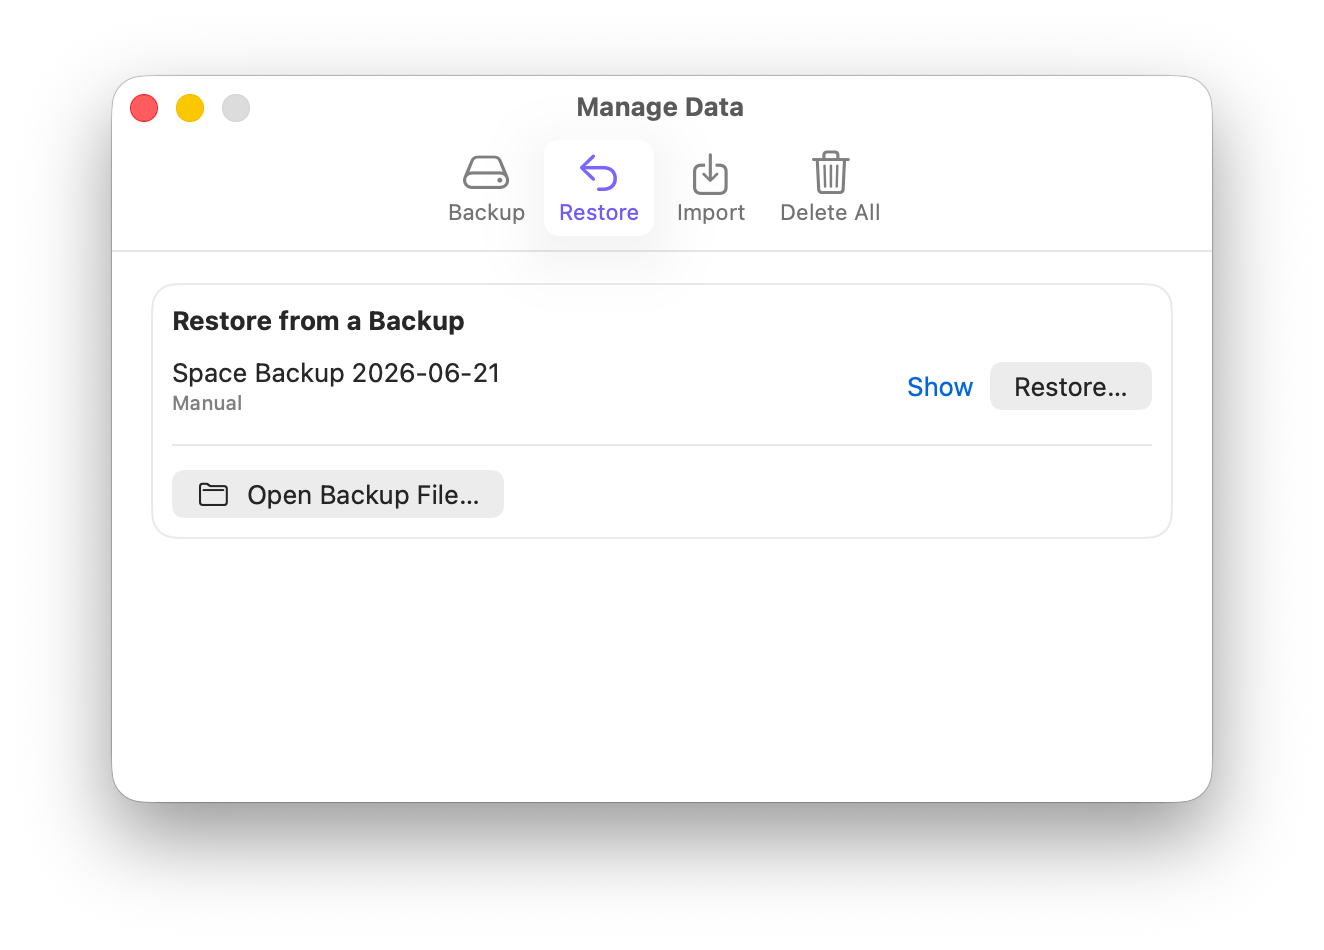
Choosing a backup to restore
Choose what to restore
After you pick a backup, Sonto shows you what’s inside and lets you choose exactly what to bring back. You might restore a single project you deleted by accident, or everything at once. You can pick any combination of:- Areas — selecting an area brings along its projects, tasks, and plans
- Projects and Plans — top-level projects and their long-term plans
- Loose Tasks — tasks that aren’t in any project or area
- Planning Notes — notes from your weekly and daily planning
- Repeating Tasks — your recurring task definitions
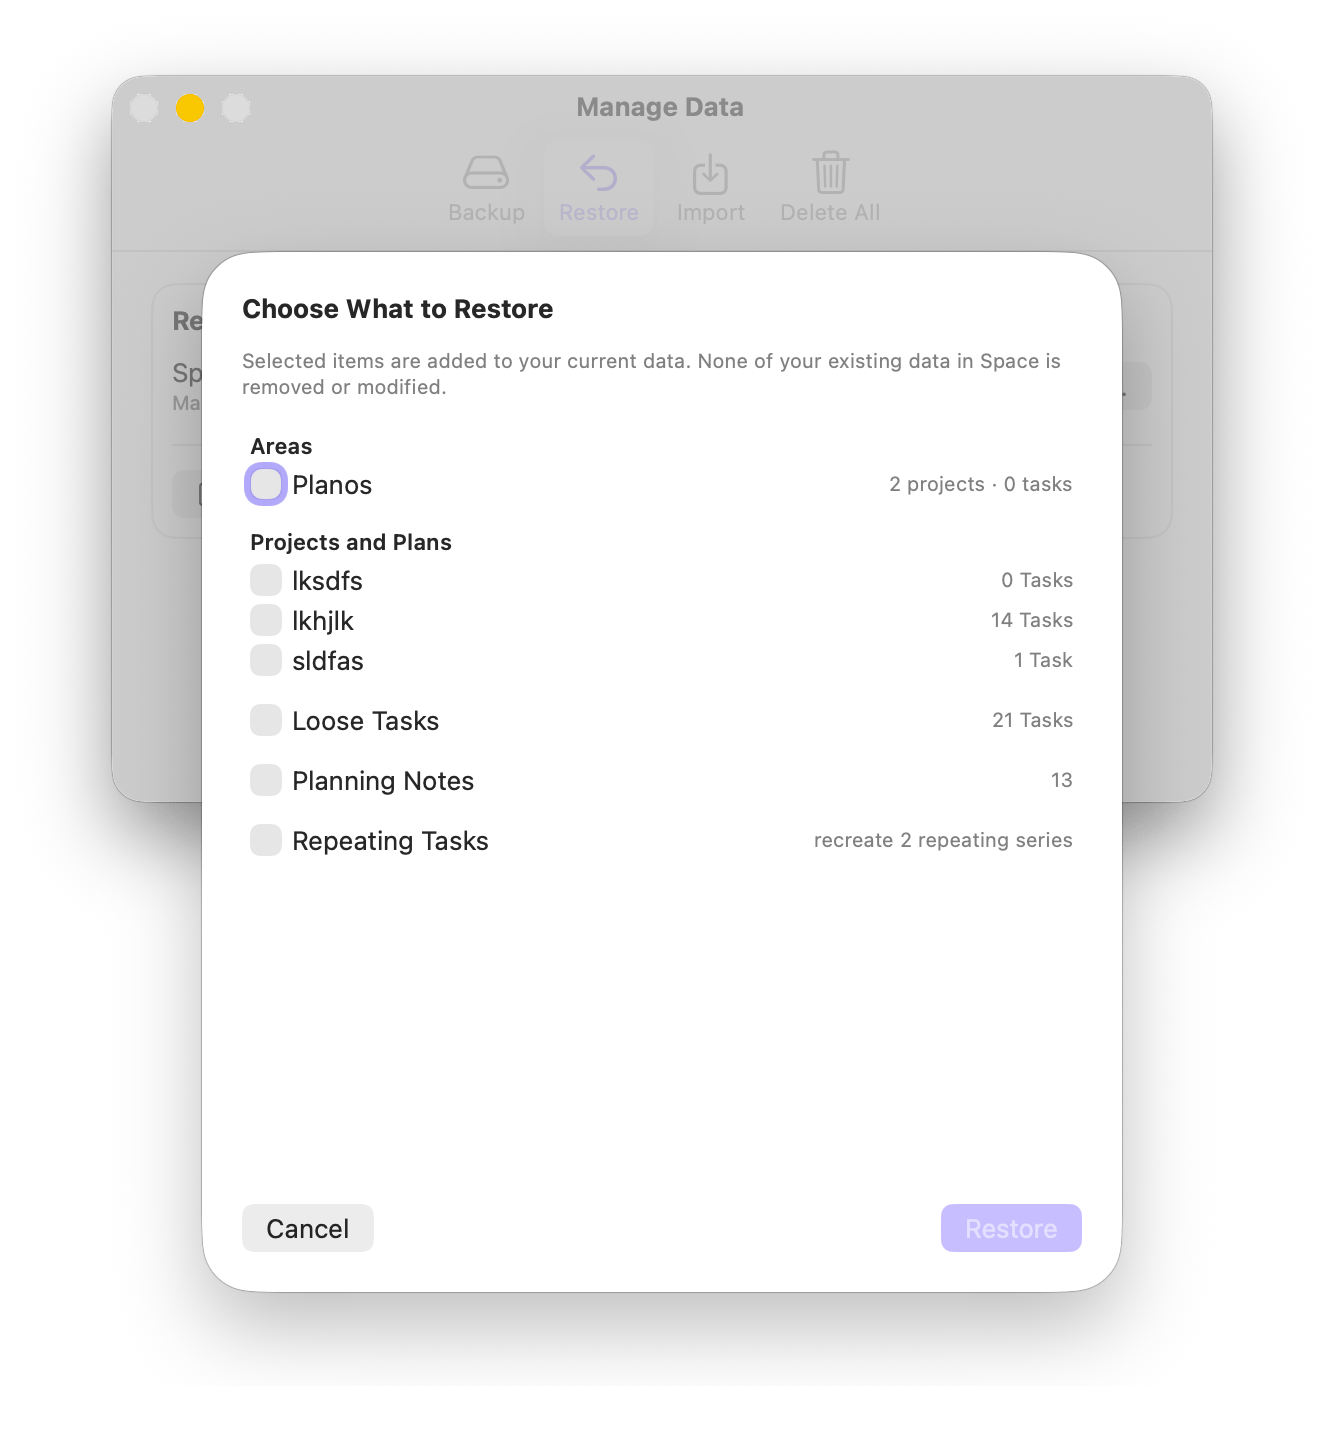
Choose exactly what to restore
- Tags with the same name are merged, so restoring won’t leave you with duplicate tags.
- If you restore Repeating Tasks, Sonto recreates the series and picks up generating future tasks again. If you leave them out, any repeating tasks in the backup come back as ordinary one-off tasks instead.
Restore and your selection is added to Sonto.
Import from other apps
Switching to Sonto from another app? The Import tab brings your tasks across from Apple Reminders, Todoist, and Things 3 — it has its own page: Import from Other Apps.Delete all data
The Delete All tab erases everything in Sonto on this Mac. To go ahead, clickDelete All Data…, type DELETE to confirm, and click Delete Everything. Your app settings are left untouched.
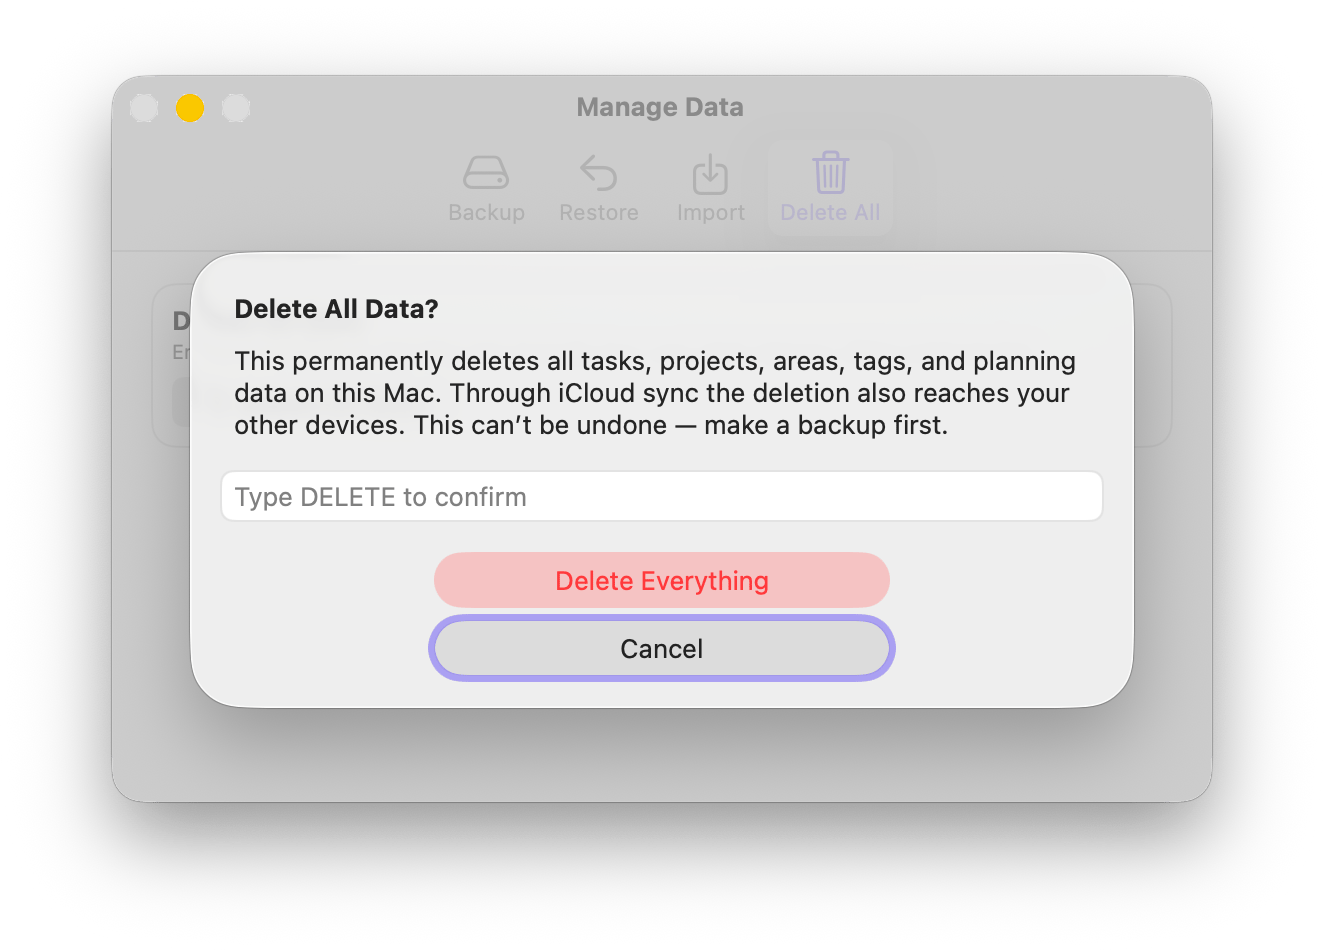
Deleting all data takes a typed confirmation